Trial and error is the only way to learn mapping.
It will take time. You simply have to do. One room leads to another, a corridor, an outside area. the ability to build from scratch is not taught. It comes from practice. You want to express yourself. And this is your canvas.
Small, tight, smart. Think vertical as much as horizontal. and try to make it original. This a repeat from the introduction page. But it might make more sense now.
Build in small chunks, components and prefabs, and then assemble it together as your project takes shape. Advantage? Small incremental accomplishments. You make something, you see that it functions properly, learn some stuff in the process, and then start the next component. It never gets overwhelming. If you build that way, you'll find that thinking through the creation of a level is easier. You'll then know you need a couple rooms, a corridor, an atrium. That's how the professionals do it, various team mappers build components and then they're assembled and tested. And if something sucks, then its only that component that sucks, its doesn't translate to the rest of the level, so that chunk is shelved, and a new piece is created in its place, compensating for whatever inadequacy was present. And you should always put something down on paper. Mapping is akin to archtitecture, in the real world you'd never build anything without blueprints. It's just a starting point, they don't need to be adhered to, but they are a step in the process. And to follow through on the analogy, building from the ground up makes a lot of sense, cause it helps towards scale, composition and space.
Start small, realistically, if this is your first map, try making a deathmatch for four players
All right, let's build upon what we have already learned. A corridor.
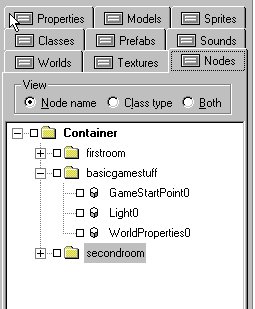
Let's go back to those two rooms we built in the previous tutorial placed beside each other. Since they're each in a container, let's go into the node tree and select "second room", and then drag it in the floorplan view approx. 1024 units away. It should snap to the grid if you are still at 64 gridsize. (I think staying on the grid is very important)
We now want to put a nice corridor between these two rooms.
We have a few options:
- We can build it from scratch
- We can use the six room Brushes we already have to get us started or
- We could dig through one of the sample maps and borrow an official prefab
We're going to be dealing with prefabs in a later tutorial so we'll leave that option for then. Building the corridor from scratch makes sense if you're changing the look and feel of the corridor. But since this corridor will be part of the same complex as the rooms, and these rooms already have the right textures on the Brushes, we'll just use what we already have, and save time.
With the "second room" still highlighted, copy and paste alternate a third room, and go into the node tree and rename it corridor1. Since we have a corresponding opening in both rooms, move the corridor between them, and stretch/compress the floor and ceiling brushes so they butt up to the two rooms, with a doorway at either end, and then move the two wall Brushes, so they seal up the level. You quickly notice you have two additional Brushes.
Again, we have a couple options:
- You can delete them, (but since they're already textured and sized for your level, you are tossing away an incremental amount of time. It's much better to use them.)
- You can resize them into pillars or
- You can split them in half and use them as columns
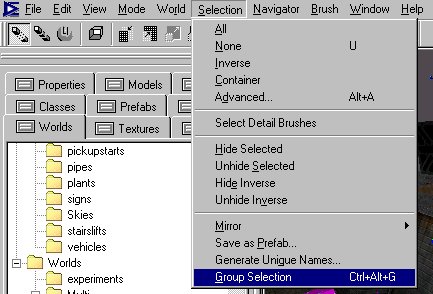
We're going to do both. Select the two additional Brushes, and group them. Under selection click group selection:
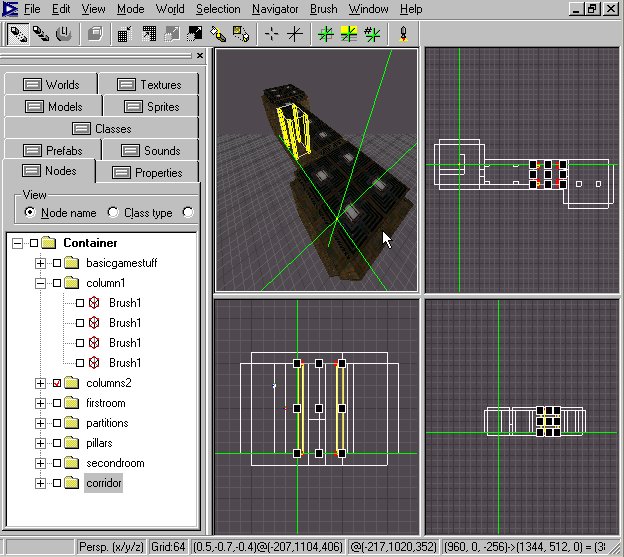
Immediately in the node tree, name the resulting container Pillars, and then copy and paste alternate the pillars folder and name it columns.
We're going to use the columns in the corridor, and we're going to use the pillars in the second room.
Select the column Brushes, and using Split, slice them in half. If you can't remember how to split, check the earlier tutorial on Dedit Basics. A good size for a side column is 32 x 64 so resize these in the topdown view and move them against the wall opposite each other. Now we should have four columns, two on each side of the corridor and butted to the wall without overlapping. Columns look good 256 units apart from each other. But this is a long corridor, so select the four Brushes and copy/pastealternate four additional Brushes and place them in the corridor 256 units apart.
That's a lot faster than building them from scratch. The amount of time a map takes to create is in direct proportion to the incremental savings in time with redundant tasks.
We still have those pillars. Placing a couple pillars in the second room and resizing them to 64 x 64 in the top view should take about a minute. Always remember good mapping happens in the details. Make sure your Brushes do not overlap. Check this using all the views available.
All said and done you now have an empty first room, and a second room with pillars, and a 1024 long corridor with columns on the side joining them. I just had a thought, ...
Mapping is a creative process, and usually inspiration will hit you. I want to do something with that first room. Let's go into the node tree and find the pillar folder. If we select one of the pillars, it'll already be highlighted in the tree, select the pillar container, copy/pasteALT (I think you're noticing I use this a lot, reason is it keeps the Brushes on the grid) and in the node tree, name the new container "Partitions", and then in the top floor view drag the selected pillars into the first room. Now stretch out the two Brushes so they make divide the large first room into smaller rooms. A T-shaped design could work well. Make sure the wall doesn't intersect the GameStartPoint. move the GSP if necessary.
We could do a process now but let's look at one other object that we only skimmed over before.
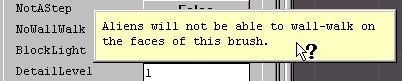
And if you want to mess with the aliens a bit, you can always set the flag on your brushes to NOWALLWALK=TRUE
WORLD PROPERTIES OBJECT
This is one of the truly powerful objects that is easily overlooked, but absolutely necessary, you can't create a level without it. We had included it in our initial level and placed it near the game start point.
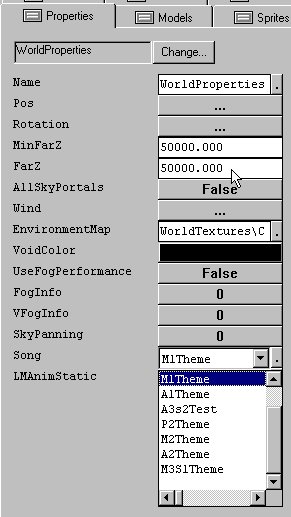
You can set the theme of music that will play when The Player makes contact with threats in the level and the general ambient music score.
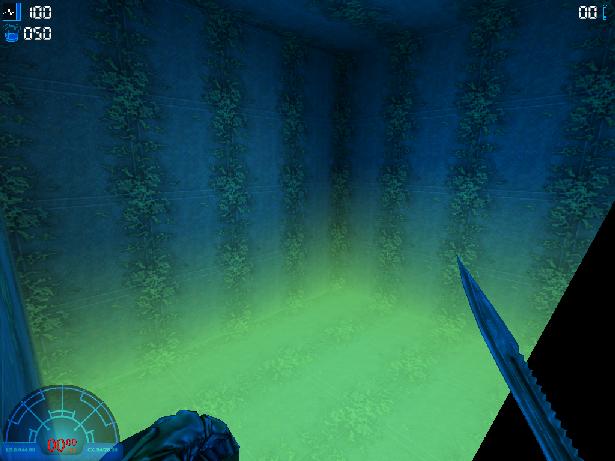
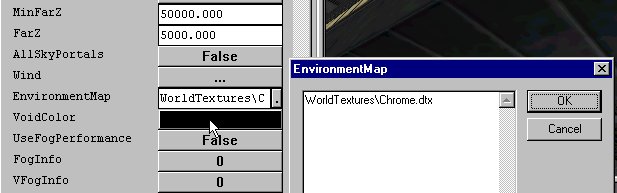
You can set the FarZ, which is the far clop plane, beyond this distance the engine does not draw the level. This is a very powerful setting. If you level has a lot of detail and some bad frame rates you can lower the number to some thing between 2000-5000 ( Dedits default number is 50000) it will cut down on the amount that needs to be drawn. If you set this but don't make an adjustment with the FOG you would see a solid wall of whatever color the void color is, in this case black. To hide this, you couple a short farZ with distance fog:
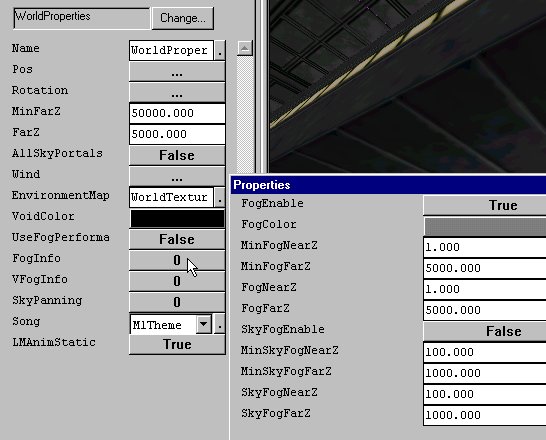
This fog distance is always relative to the player position. So the fog starts (thiness) 1 unit away from the player, and is 100% OPAQUE (thickness) at 5000 units from the player. The important flag is setting the FogEnable=TRUE (it's necessary for Vfog as well). Usually you would not have the fog start at 1, but rather 256 or 512, cause it makes the details in a room look rather dull. It should also be noted that this fog happens througout a level, both inside and out.
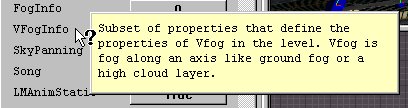
A first relation to fog is VFog or VERTICAL FOG, similar to what you see in DM RESERVOIR. It isn't placed in relation to the player, but rather in relation to the level. The numbers for MinY and MaxY are in direct corresponding Y values of your actual level.
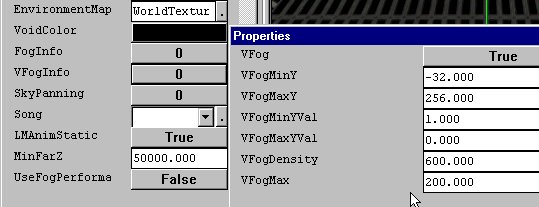
If you set Vfog true regular fogEnable must be set True as well. I have to thank Nerotrobe for these settings. If you play with the colors and the settings you can get some pretty funky results.
One of the other things you can change with the properties setting is the chrome effect that happens on all the weapons. You can set a different file. This is more an advanced modding type thing, but I figured I'd mention it.
Alright, let's do a process on this level of ours and Run it. Check out your handy work. If you've added fog, you can play with the numbers and experiment and re process. You'll find something you like.
Here's a dowload of my version if you're interested. Firstcorridor.zip